Showing posts with label Facebook. Show all posts
Sunday, April 13, 2014
Tips for Getting your Etsy Shop and Facebook Page Noticed
If you are like me, you are a new entrepreneur with dreams of expanding your crafty hobby into at least a part-time business that earns you at least a little monthly spending money--or more! You've spent countless hours drooling over gorgeous hand-made goods on Etsy. You follow numerous crafty blogs and Facebook pages. You've spent more time and energy than you can remember crafting and creating the perfect gift for family and friends. But you want more. You want a wider audience. You want to share the love and your passion with others.
So, you make your own Facebook page highlighting your craftiness. There, you think! This is the world wide web! I have the whole internet at my fingertips! And you invite your friends and your family to like and share your page. And a few will. Most won't. And, it's easy to become discouraged. You think to yourself, how will I ever sell anything if I can't even get my own friends and family to spread the word?
Well, friends, pay attention, because here are some very helpful tips I've learned this past week.
1) Don't keep waiting for the "Right Time" to open your own Etsy shop.
Do your research, yes. Decide what you want your shop theme to be. Research like shops, how much they list and ship items for. Who they follow, etc. And then MAKE YOUR SHOP AND PUT IT LIVE. The Etsy community is amazing! Once you have your shop open and ready for sells, JOIN TEAMS. Teams are a great way to promote and get your shop visible. Etsy is such a huge community, it's easy to get lost in the shuffle. So, you need to network. You do this by liking (or favoriting items and shops as it's called on Etsy). Do this for as many shops and items as you can. And follow people. Because, Etsy artisans love to help each other out. The philosophy is "You promote me, and I'll promote you." Does this mean you will get a sale your first day? No. Does it mean you will get a sale your first week? No. Your first month? Not necessarily. But, the more you network, the more your product is out there, and the more people will see your stuff.
Create treasuries on Etsy. Treasuries are groups of 16 items linked together to form a sort of listed window shopping experience. Highlighting a person's item in a treasury is a huge compliment. It promotes their shop, and makes your shop visible as you are the curator. Make as many treasuries as you can. Again. You promote me, I will promote you.
I am not claiming to be the highest authority on Etsy. In fact, I just opened my shop a week ago. I had had a previous shop, but I was not prepared for it. Honestly, in the time I had it open, I believe I have had less traffic than I have had thus far. Since last Monday, and as of the moment I am writing this, I have had 258 views to my profile, 44 people admire my shop, and 232 different combinations of favorites (with 39 being the highest and 9 the lowest) of the 10 specific items currently listed in my shop. And, while I could be bummed because I haven't sold anything yet, I choose to be overjoyed because my Etsy networking is working!
2. Join Craft Groups on Facebook
I mentioned before that I was having a very hard time getting friends and family to like and share my FB page. I'd say only about 1/3 of my friend's list has actually "liked" it. And honestly, FB isn't the place to spend all your time and energy trying to promote your page. The biggest benefit, I think, to having a higher number of likes on Facebook, is when you link it to your Etsy shop, it shows people there is also interest in your product outside of Etsy. So, look for groups and join them. A couple I have joined recently are called My Etsy and It's Better Handmade.
Once you are there, engage. You do this by sharing your shop, your Facebook page, and your items. But, most importantly, interact with others. Network. Share the love.
3. OK, share the love. But how does that get my shop and page noticed?
Follow these steps:
1. Follow the links to what someone has posted. If it goes to their Etsy shop, then favorite the shop and their item. If their Etsy shop shows a link to a Facebook page, make the effort to visit and like that page as well.
2. When you comment on their item in the group, compliment it first and foremost. People like to hear compliments. Crafters love to hear what people like about their craft. We work hard on these items. Sure, anyone can just "like" it, but you really stand out when you say something nice about it. Then, tell them how you interacted. For example you could say, " I really love the color combinations on your purse. It looks so Spring like. I favorited your Etsy shop and the item. I've also liked your Facebook page. From so and so at then link your page so they can find you" (REMEMBER, ONLY LIKES FROM PERSONAL ACCOUNTS COUNT AS LIKES)
3. Like I said, us crafters like to help each other out, so if you like, favorite, whatever, and let the other person know, and odds are, they will return the favor! I was stuck at 97 likes for the longest time. I couldn't get anymore friends or family to help me expand out, but once I started doing this, my FB page likes have jumped to almost 150 in less than a week! Share the love!
Don't forget. Use Social Media to your advantage. Tweet. Use Instagram. Share your FB page. Blog. Do whatever you can do to make your shop visable to others. But, while you do that, remember to to share the shops and pages of others because we all want something amazing!
And because I'm still new at figuring out blogger, here are the unlinked URLs of my stuff for you to share the love. Because, when you like and favorite me, I will do the same back for you.
Facebook:https://www.facebook.com/EmalieAlexander
Etsy: www.etsy.com/shop/EmalieAlexander
Twitter: @EmalieAlexander Instagram: emalie_alexander_creations
Tuesday, March 11, 2014
Crocheted Chains and/or Braclets Options
This was recently a special order I shipped to a woman who has 8 year old twins with special needs. When she had seen the 100s Day Chain (previous post) that I had done, she asked me to create some with button closures for her daughter that could be used as occupational therapy. I created 10 of the blue and white. These I did with a wider width. I have 10 of the multicolor. These are a bit longer and slimmer, and then I have five each of the green and brown and the pink an black. The response I got upon receipt of these was "oh my goodness they couldn't be more perfect!!! Thank you so very much. You are very talented!!"
Monday, March 3, 2014
Shop Information Q&A
1--I don't see anything listed with prices, why?
Currently I'm mostly doing custom orders. This means, I will post products I've made, or ones I am currently working on. If you see something you like, then you can comment or message me, and I will work out a custom order for specific items and prices for you.
2. This is Facebook. How does payment work?
Good question. Just like many online shops, I accept PayPal. I will send you a paypal invoice.
3. How quickly will I get my product?
I will do my best to get your product out as quickly as I can. Keep in mind, blankets and larger things take longer to make, than small amigurimis, etc. If you need something by a specific date, be sure to mention that, and and try to plan ahead to give me time to craft a quality item for you.
4. Are you planning on expanding your shop outside of Facebook?
The short answer is, yes. I am considering opening up a brand new Etsy shop. Once I do this, I will make you aware here.
5. Do you do more crafts than just crochet?
Yes. I do lots of crafts. Although, currently I am spending more time with crochet.
6. Where are you based and are you willing to ship internationally?
I am based in Ohio, and yes, I'd love to ship internationally.
Sunday, March 2, 2014
Networking Challenges
With my home-based craft business, I'm trying to branch out and network. So, I've linked my Facebook, to this blog, to adding a twitter account. After all this time, I'm still learning my way around his site, and I'm very very new to Twitter. So, if you come across this blog, and you use Twitter, I would love for you to consider following me @emaliealexander. Search for me on Facebook at Emalie Alexander Creations.
While I used to have an Etsy shop I hadn't yet specialized my skills to a skill set that works well for interest in Etsy buyers. Trying to get fans on Etsy was hard work, so I shut down my shop and took some time to start honing down my skills into mostly crochet with some sewing and other things on the side. I've put a few of my items into a first time very small craft show, and did much better than I expected. I am considering opening a brand new Etsy shop. I probably should do that before my Facebook/Blog/Twitter name gets taken on Etsy.
I recently did a whole make-over. I changed my name from Big Bang Momma Crafts (being a huge Big Bang Theory fan and a mother, I loved that name, but decided a need a brand name a little more professional) to Emalie Alexander Creations. I've been working at updating my sites to offer more information for potential buyers or just interested lookers.
At this stage in my endeavor, I'm trying to build an audience, a fan base, people who will support me, help me succeed, and branch out past my "1st degree" of contacts. This means, currently I mostly am working on custom orders. I post pictures of things I've made, or what I can make, and then people ask me to make something for them based on what they've seen. I don't really have things "listed" on Facebook. I understand. It can be a scary place to shop. This is another reason I am considering a new Etsy shop. I want people to be interested, and pleased with my inventory. I want to get my name out there. I want people to take me seriously. I want people to be happy with my product. And, ideally like any entrepreneur, I'd love for my hobby to turn a little profit. This helps supportthe addiction and I can craft for a wider audience than just gifts for people near and dear to me.
If you come across this post, and are willing to help me network, especially on Twitter or Facebook, I'd be so happy, and I would most definitely reciprocate.
https://www.facebook.com/EmalieAlexander
Thursday, February 27, 2014
Blog Name Change!
Big Bang Momma Crafts has changed its name to Emalie Alexander. You can find us on Facebook as Emalie Alexander and on twitter @EmalieAlexander!
Sweet Little Bear
This is the first of four custom order bears. He measures about 6" tall and mostly follows a free Lion's Brand pattern. Come find him, and other crafty things at my Facebook Craft page. Search: Big Bang Momma Crafts.
Thanks, and have a great day!
Saturday, February 22, 2014
Pink Beaded Fingerless GloveI
I recently made some simple teal fingerless gloves (my first pair, actually) for a friend of mine who lives a few states over from me. I followed the pattern, tested it on me, took measurements and pictures, and sent the first one on it's way to her. It fit, so I sent it's pair. What does that have to do with this? Let me tell you.
She asked me if I could alter the pattern to make a pair that would fit her seven year old daughter. A girlie pair. Possibly with a beaded trim. Of course I obliged. And, the love you see here is what I came up with.
Luckily I have an 8 year old daughter who is a bit on the small side, so she got to be my lucky model for trying on sake. And try on she did!
I looked at lots of beads, but I needed a bead that would work with the width of the yarn. A Bernat baby weight yarn, by the way. I ended up settling on pony beads because, really, she's 7, and seven year old like pony beads. They're fun.
I decided not to put them exactly on the wrist border for a couple of reasons. 1) safety. They are less likely to fall off, rip off, etc. 2.) Sturdiness. I just felt the beads would be sturdier this way. We all know that 7 year old's really know how to play!
I decided I would also give the fingertips something pretty to look at, so I added shells around the edging there. So pretty.
For crochet lovers: This is just done is simple double crochets. Repeating rows until I got it as wide as I needed it. This is about 14 rows.
Friday, February 21, 2014
100s Day Crochet Chain
I was looking around Pinterest for teacher's gifts one day, and came across the idea to crochet a paper chain. Say what? I know, amazing idea! So, I took it one step further, and instead of an end of the year gift, I decided to make a 100s day chain for my son's Kindergarten teacher. I wanted it to be something she could use for several units. So, I made sure that each color had at least 10. They use 10-frames in math for counting. I also wanted the colors of the rainbow, so that she could use this for working on colors.
10-red
10-orange
10-yellow
10-green
10-blue
10-purple
That's only 6, so I added
10-black
10-white
which gave me 20 left over to get to 100. Those are the multicolor.
I used sticky back velcro to attach them. For sturdiness, I used mostly Red Heart yarn and cotton yarn. As in any paper chain, the vary a bit in length and width.
You can also find this post on the Facebook page./br>
Tuesday, February 11, 2014
Perler Bead Inchies!
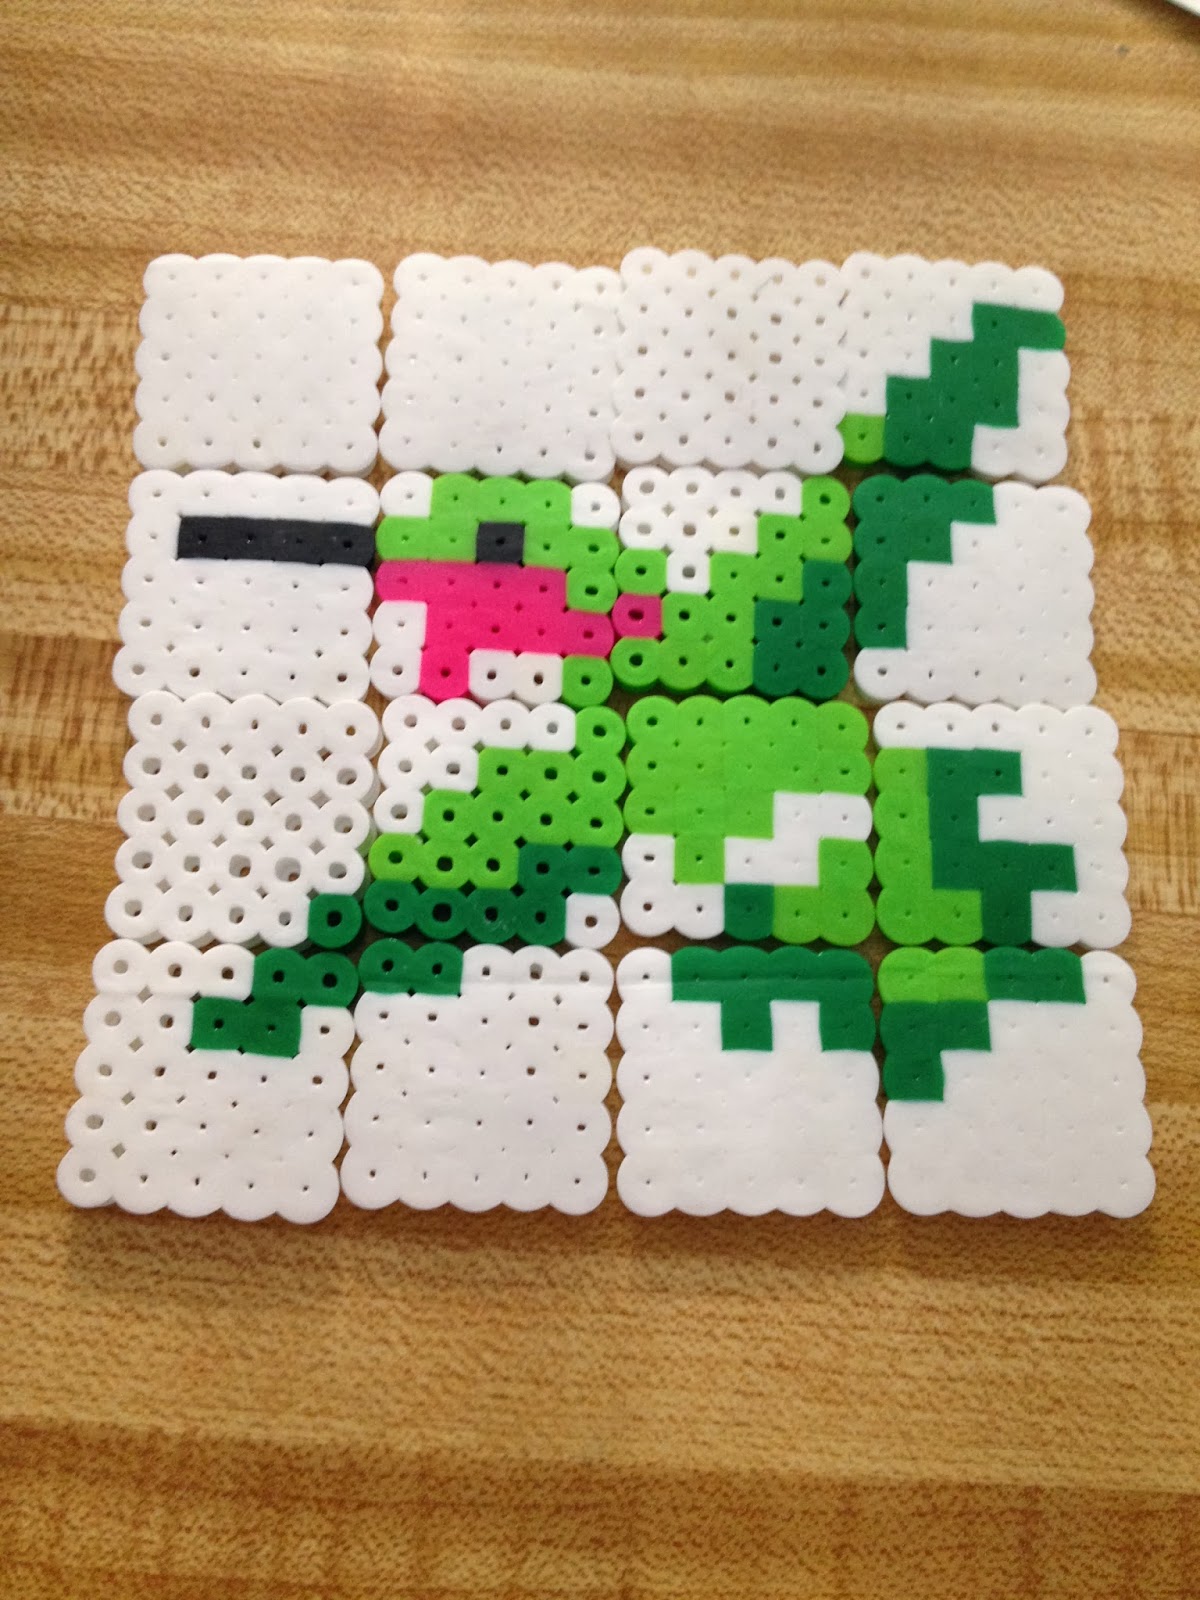
Inchies can be easier, or tougher, to make than one thinks! There are so many ways to make inchies (1"x1" square pieces of art). I've mostly stayed with the general theme of paper crafted ones, but for my recent Inchie Swap on Craftster.org, I went out of the norm and created for each of my four partners perler bead inchies. FYI, a perler bead inchie is made by 5x5 beads squared. Of course, you can group these into bigger groups (just leave a bead spot separation) to make a larger picture. 3 out of 4 of my partners have received, so I'm going to go ahead and post these on here. I apologize for sideways pictures. Also, I found most, if not all, of these designs while searching online, and I just separated them into groups of 5x5 beads leaving a space between the groups.
Theme: black cats:
Theme: black cats:
Theme: Harry Potter (Hogwarts crest):
What a difference they are separated vs together!
Here's this one put together so you can see it better.
Theme: Spring (Hummingbird)
And, the last set is secret until my final partner receives. It had a long way to travel, so hopefully it finds her safe and sound and soon!
Thanks for looking!
Thursday, January 16, 2014
Queen Sized Striped Blanket!
Towards the end of last year I made a blanket with the same
design and similar colors. That one was a Christmas gift. My husband and
I loved it so much that we decided I must make another one.
So, we changed to brown from gray, and kept the other colors the same. We went from Super Bulky to Lion's Brand Jiffy Bulky yarn. I used about 20 skeins! It measures about 100"x100". For reference, a quick search on Google shows that a queen blanket measures 90"x90". I was getting pretty quick (when I didn't have to pull out a row or two for not finishing my "v" stitch) that I was getting about 7 rows completed in about 2 hours, or about a row every 20-30 min or so.
So....it repeats 7 rows blue, 3 rows white, 4 rows brown, 3 rows white, 7 rows blue....... all "v" stitch.
I'm going to apologize in advance for the lighting. When I use flash in my room, it distorts the color. When I turn the flash off, then the pictures are dark. I really need to learn the setting on my dslr to help combat that.
Close up:
Thanks for looking!
Subscribe to:
Posts (Atom)